Working with Orders
Learn how to complete different types of orders and use navigation features.
Order Types
There are two types of operations in the system:
 Pickup (L) — Loading
- This is an order to pick up cargo from the sender
- Icon: arrow up
 Drop (A) — Unloading/Delivery
- This is an order to deliver cargo to the recipient
- Icon: arrow down
Completing a Pickup Order
When you arrive at the loading address and have picked up the cargo:
- Open the active Pickup order
- Press and hold the "Mark as Picked Up" button for 2 seconds
- Wait for the progress bar to fill
- The order will be marked as completed
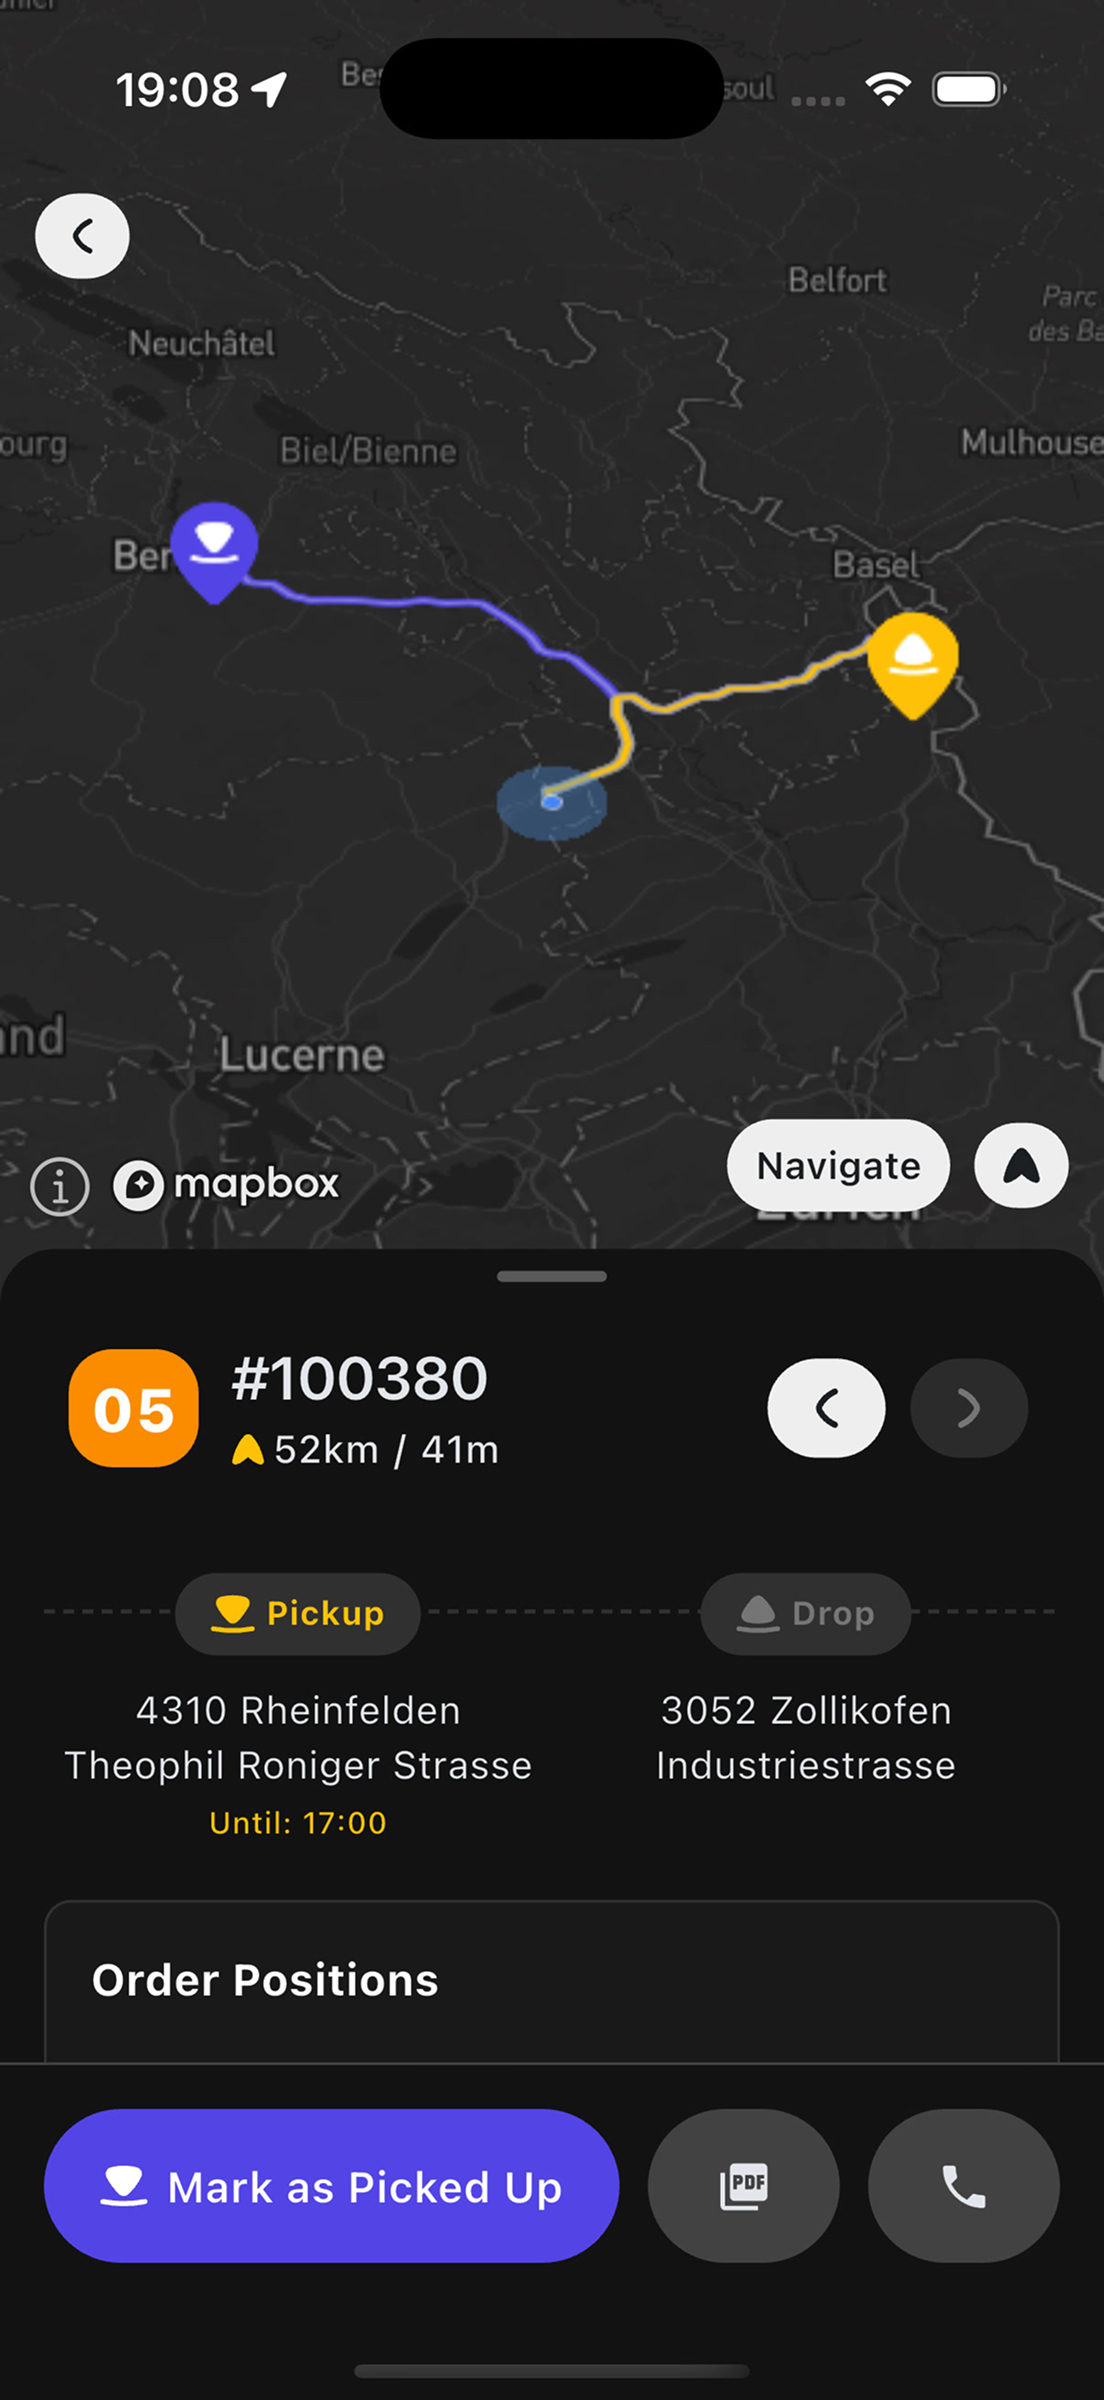
Press the button only after the cargo has been physically loaded into the vehicle!
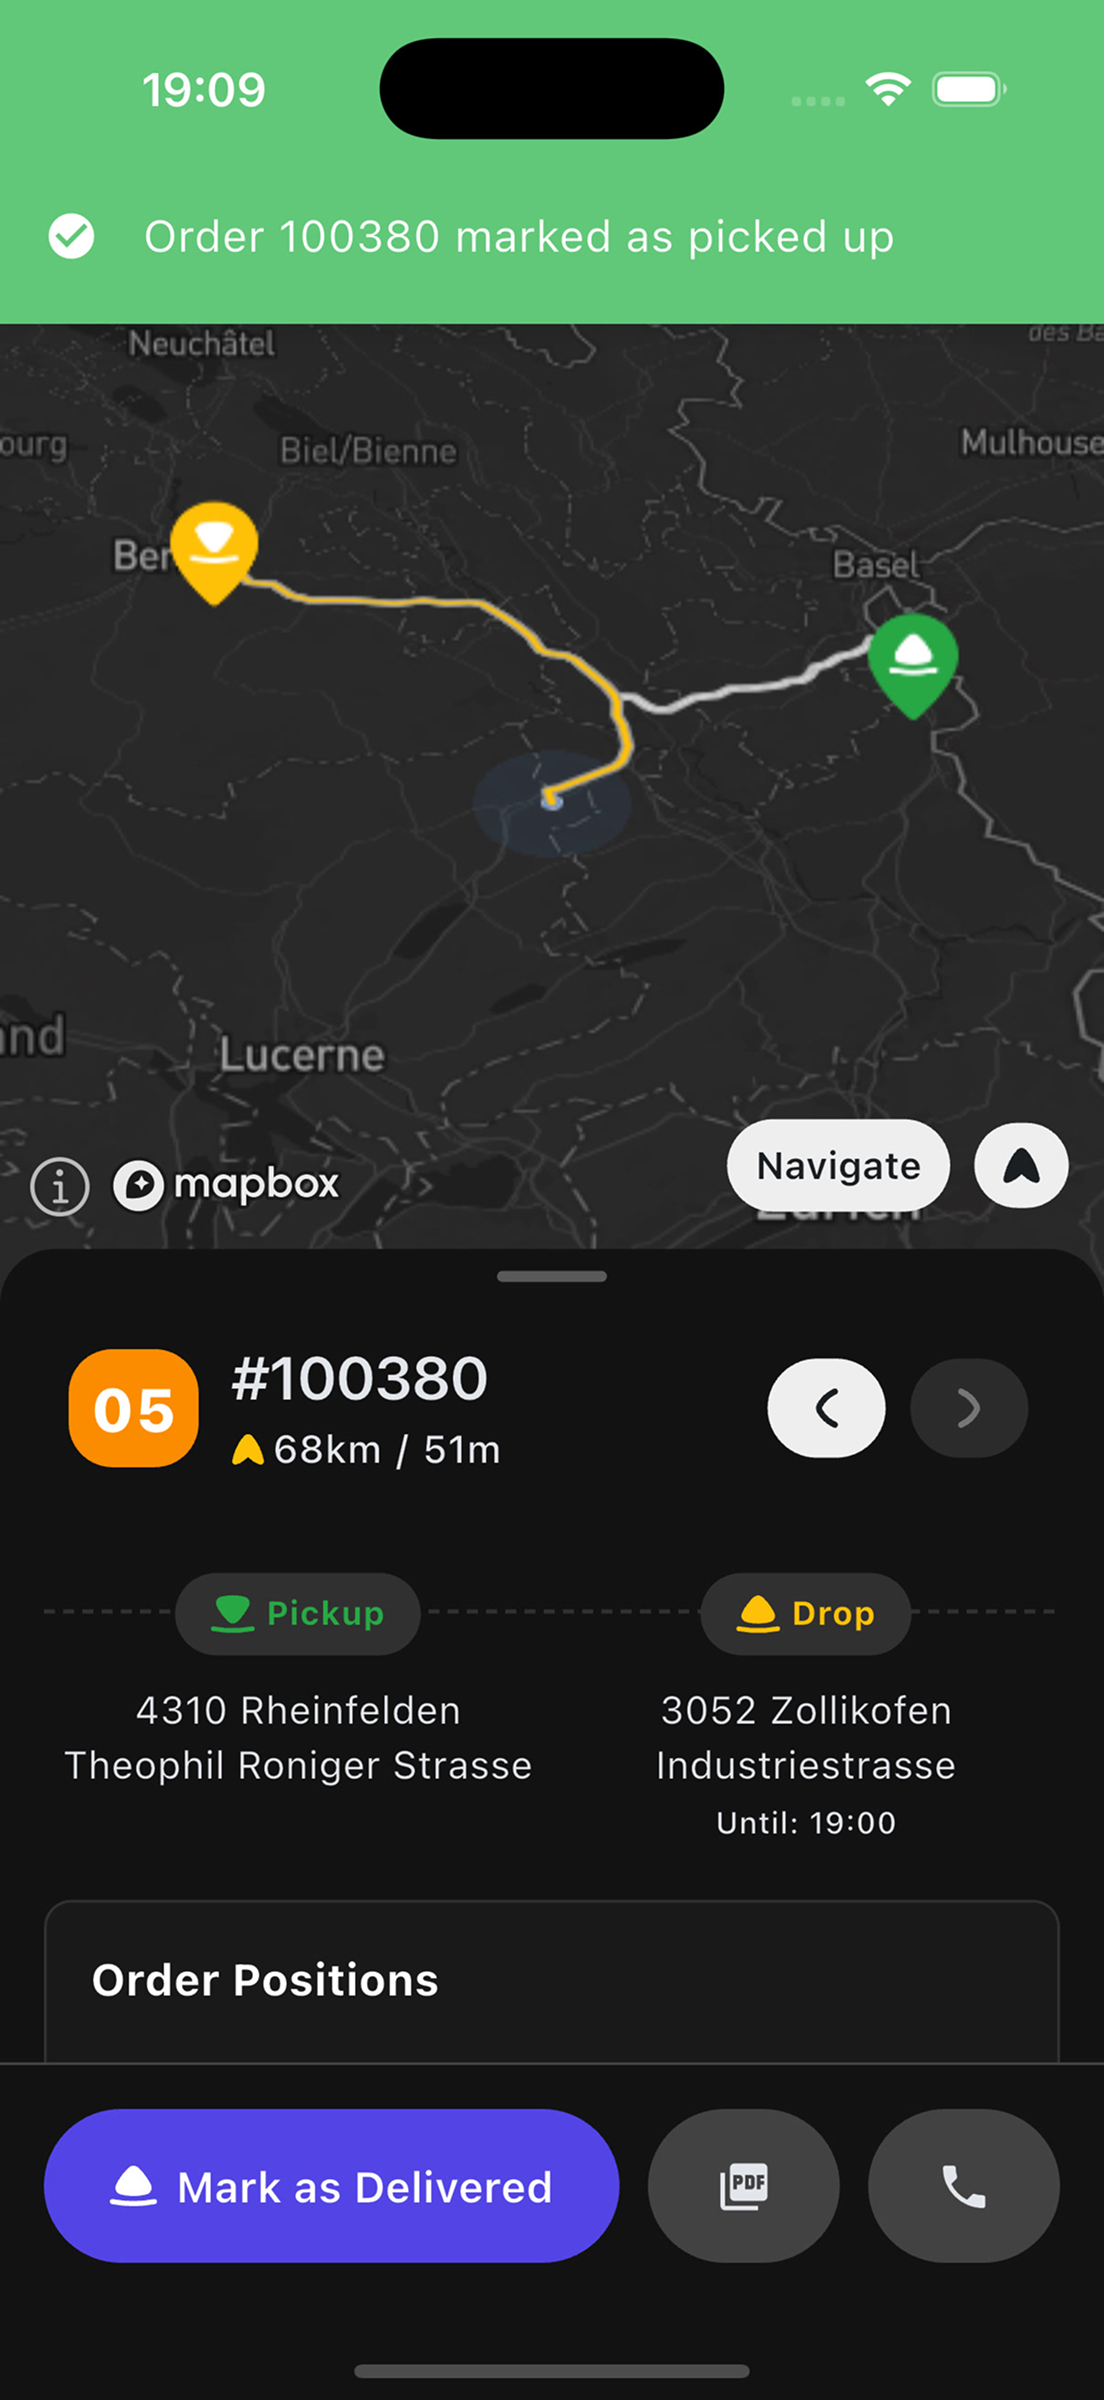
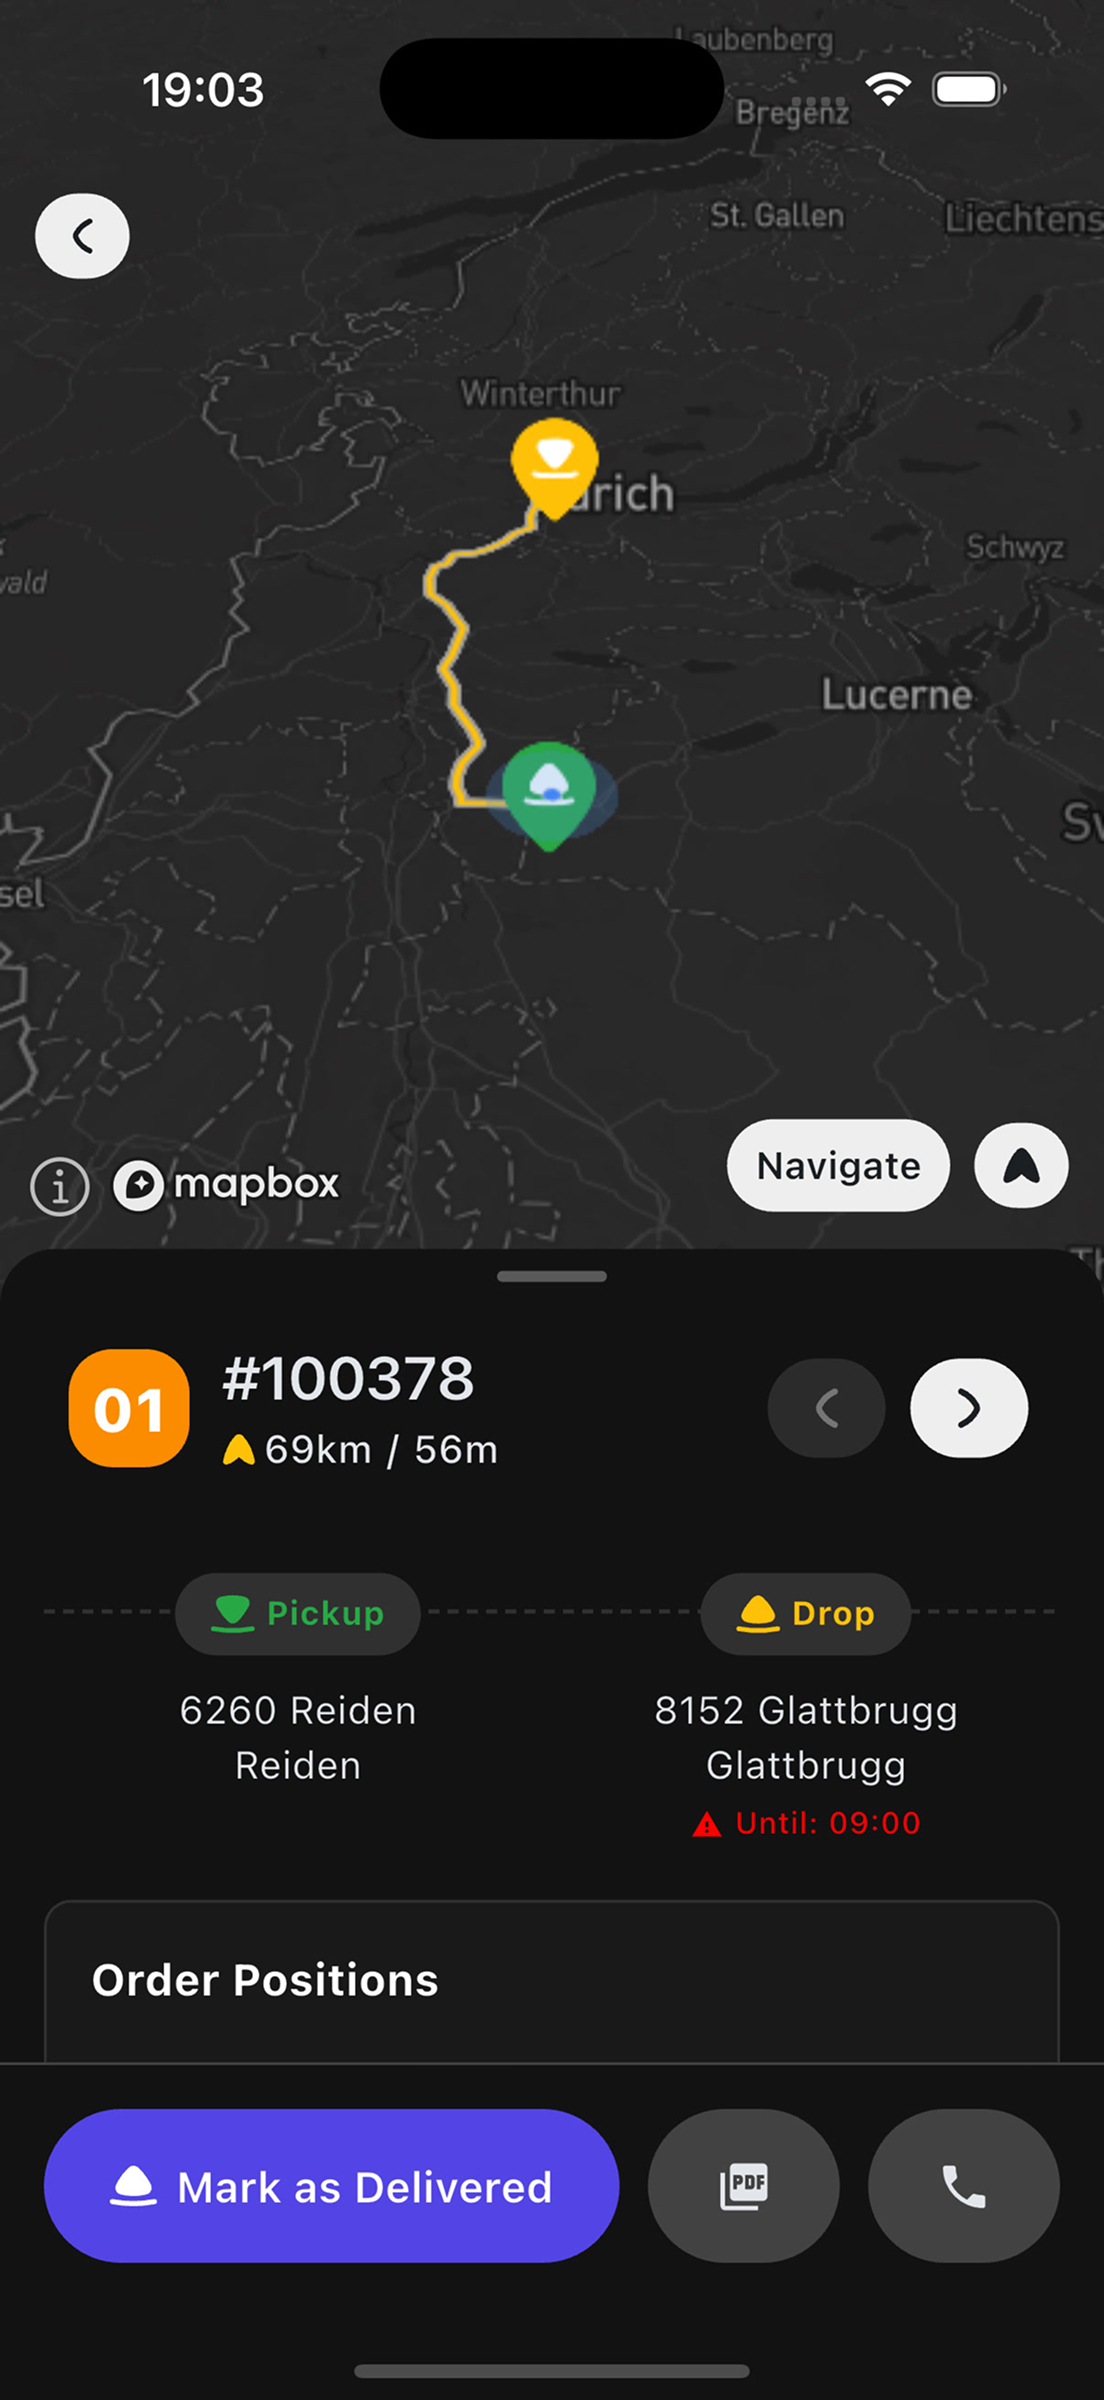
Completing a Drop Order (3-Step Form)
When you arrive at the delivery address and have handed over the cargo to the recipient:
- Open the active Drop order
- Tap the "Mark as Delivered" button
- A 3-step delivery confirmation form will open
Step 1: Delivery Details
On the first step, specify the quantity of pallets and containers delivered:
 EUP Count — number of Euro pallets (EUR pallets)
- SBB Count — number of SBB containers
- SBB Count Deck — number of SBB containers on the second deck
The table on the right displays the expected values from the order.
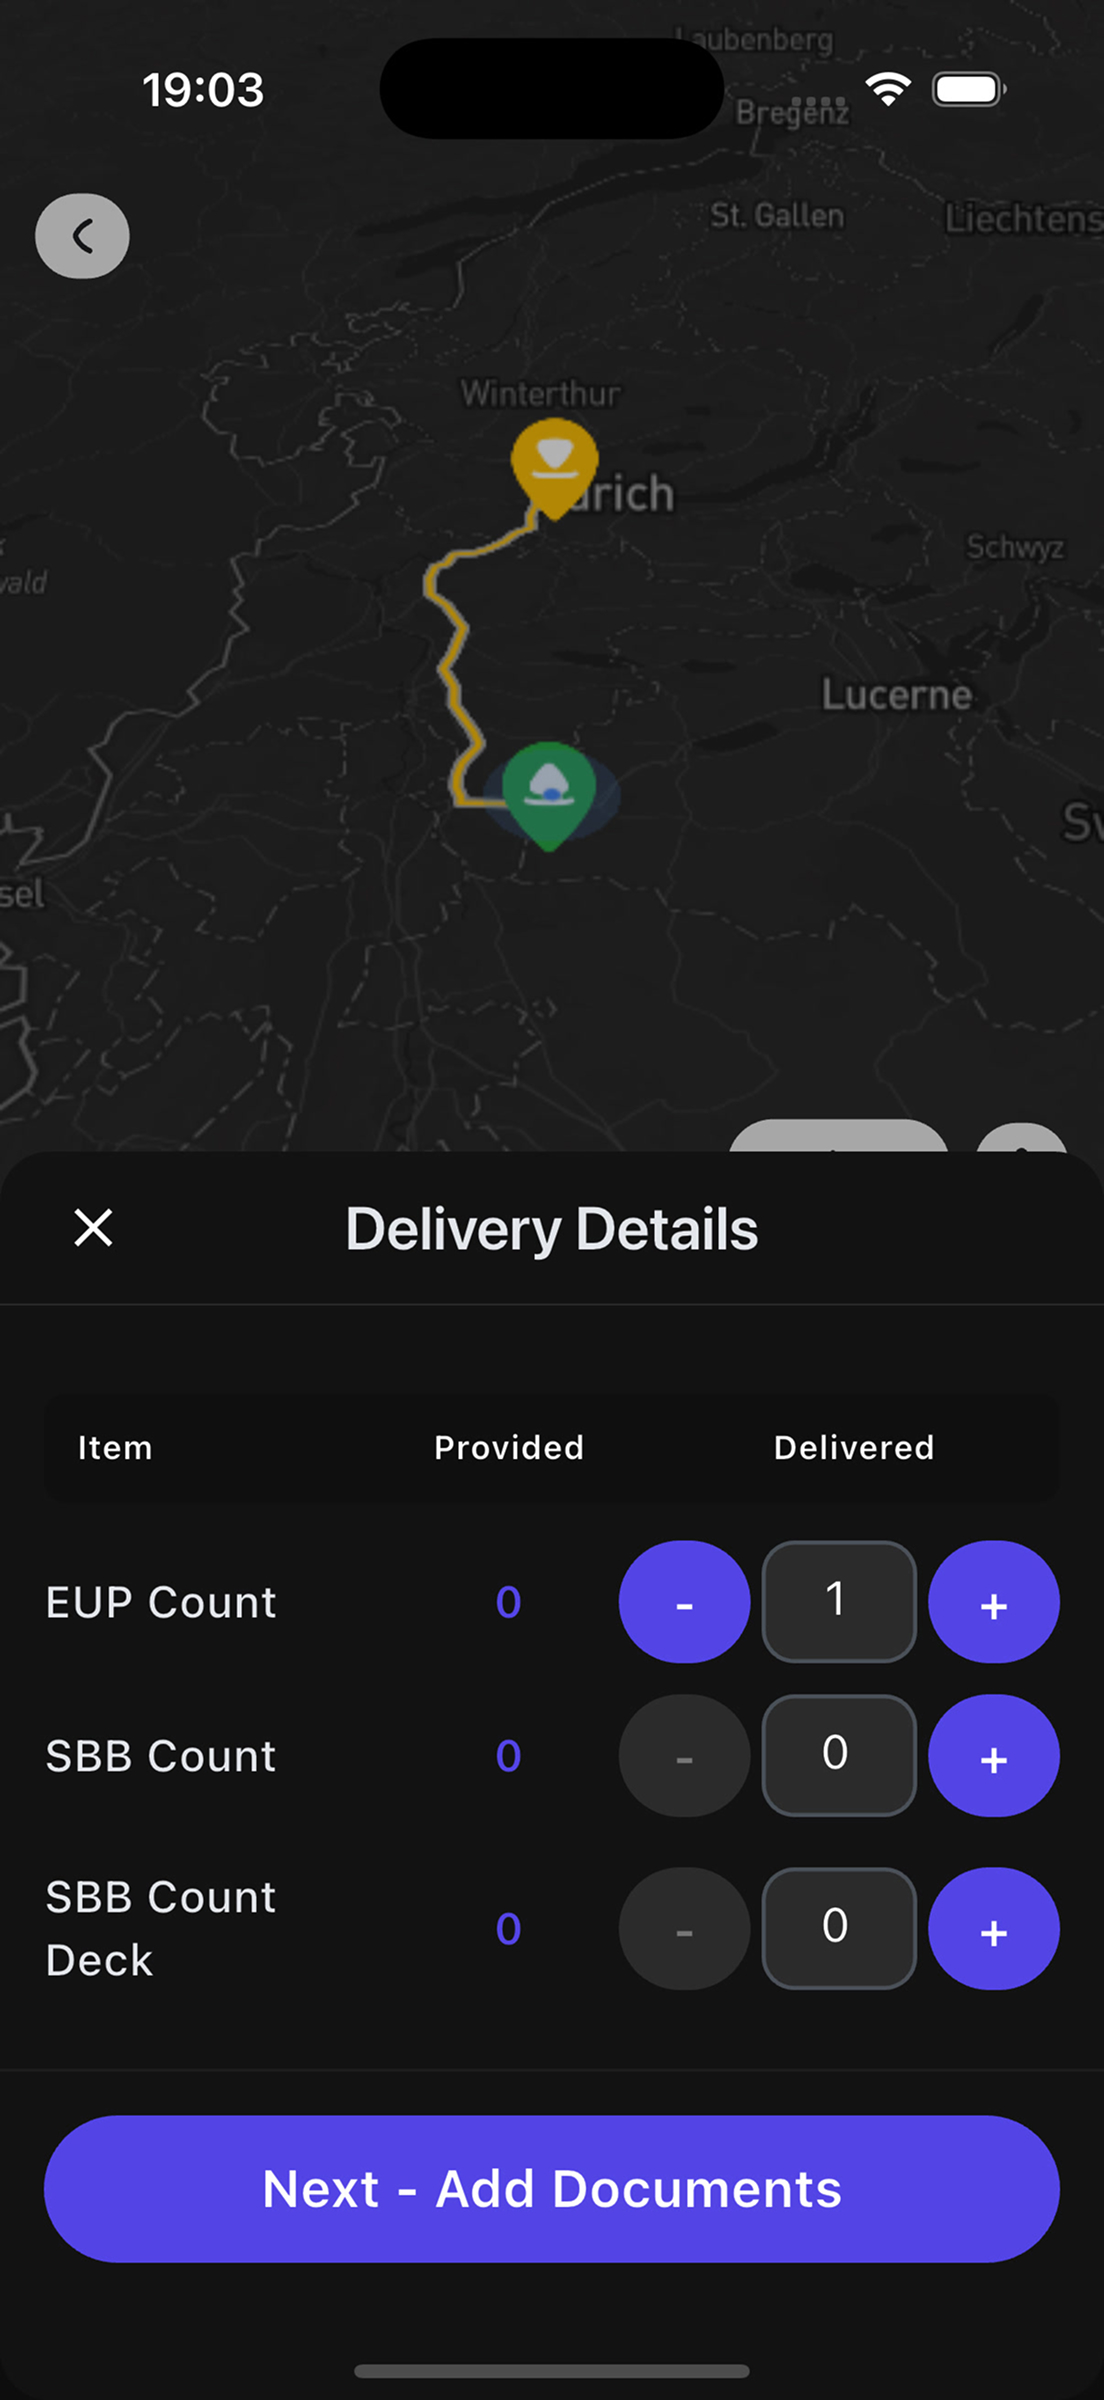
Enter the actual values of what was delivered to the recipient.
Tap "Next - Add Documents" to proceed to the next step.
Step 2: Documents (Documents and Photos)
On the second step, you can attach:
 PDF documents (waybills, receipts)
- Photos (proof of delivery, cargo photos)
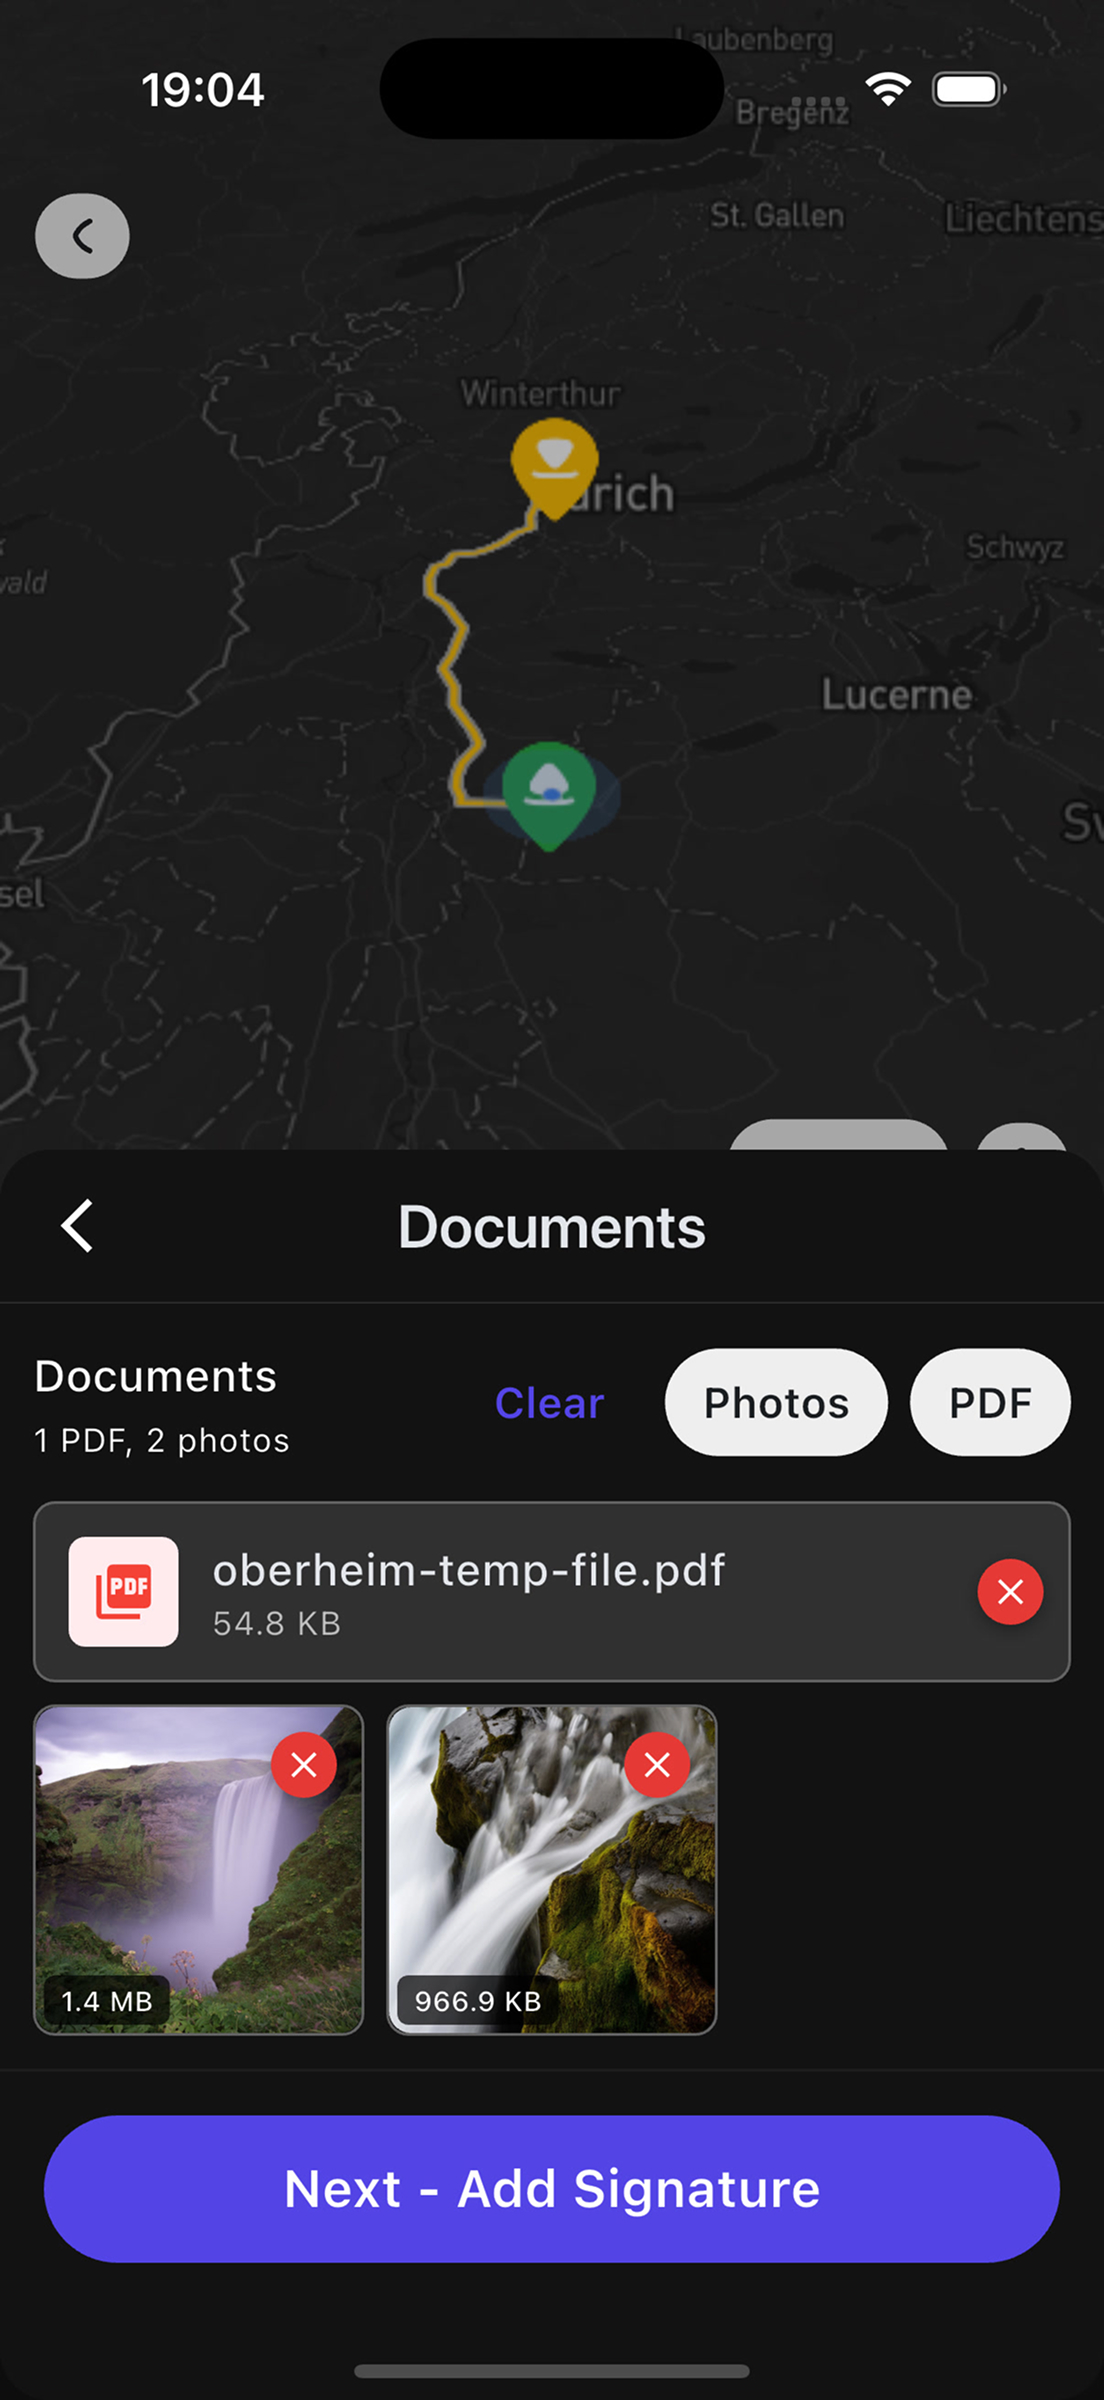
Adding Photos:
- Tap the "Photos" button in the "Documents" section
- Choose the source:
- "Take Photos" — take a photo with the camera
- "Select from Gallery" — select from gallery
- You can add up to 10 photos
- To delete a photo, tap the X in the corner of the thumbnail
Adding PDF Documents:
- Tap the "PDF" button
- Select a PDF file from the file manager
- The file will appear in the documents list
- Maximum file size: 10 MB
- Supported photo formats: JPG, PNG, HEIC
- Supported document formats: PDF
Tap "Next - Add Signature" to proceed to the signature.
Step 3: Signature (Recipient Name and Signature)
On the third step, you need to:
- Recipient (optional) — enter the recipient's name (optional)
- Signature — obtain the recipient's digital signature


Obtaining the Signature:
- Hand the phone to the recipient
- Ask them to sign with their finger in the white area "Draw signature here"
- If the signature is messy, tap "Clear" and repeat
- The app automatically applies smoothing to improve signature quality
- If you did not attach photos in Step 2, signature is required
- If you attached photos, signature is optional (but recommended)
Tap "Confirm Delivery" to complete.
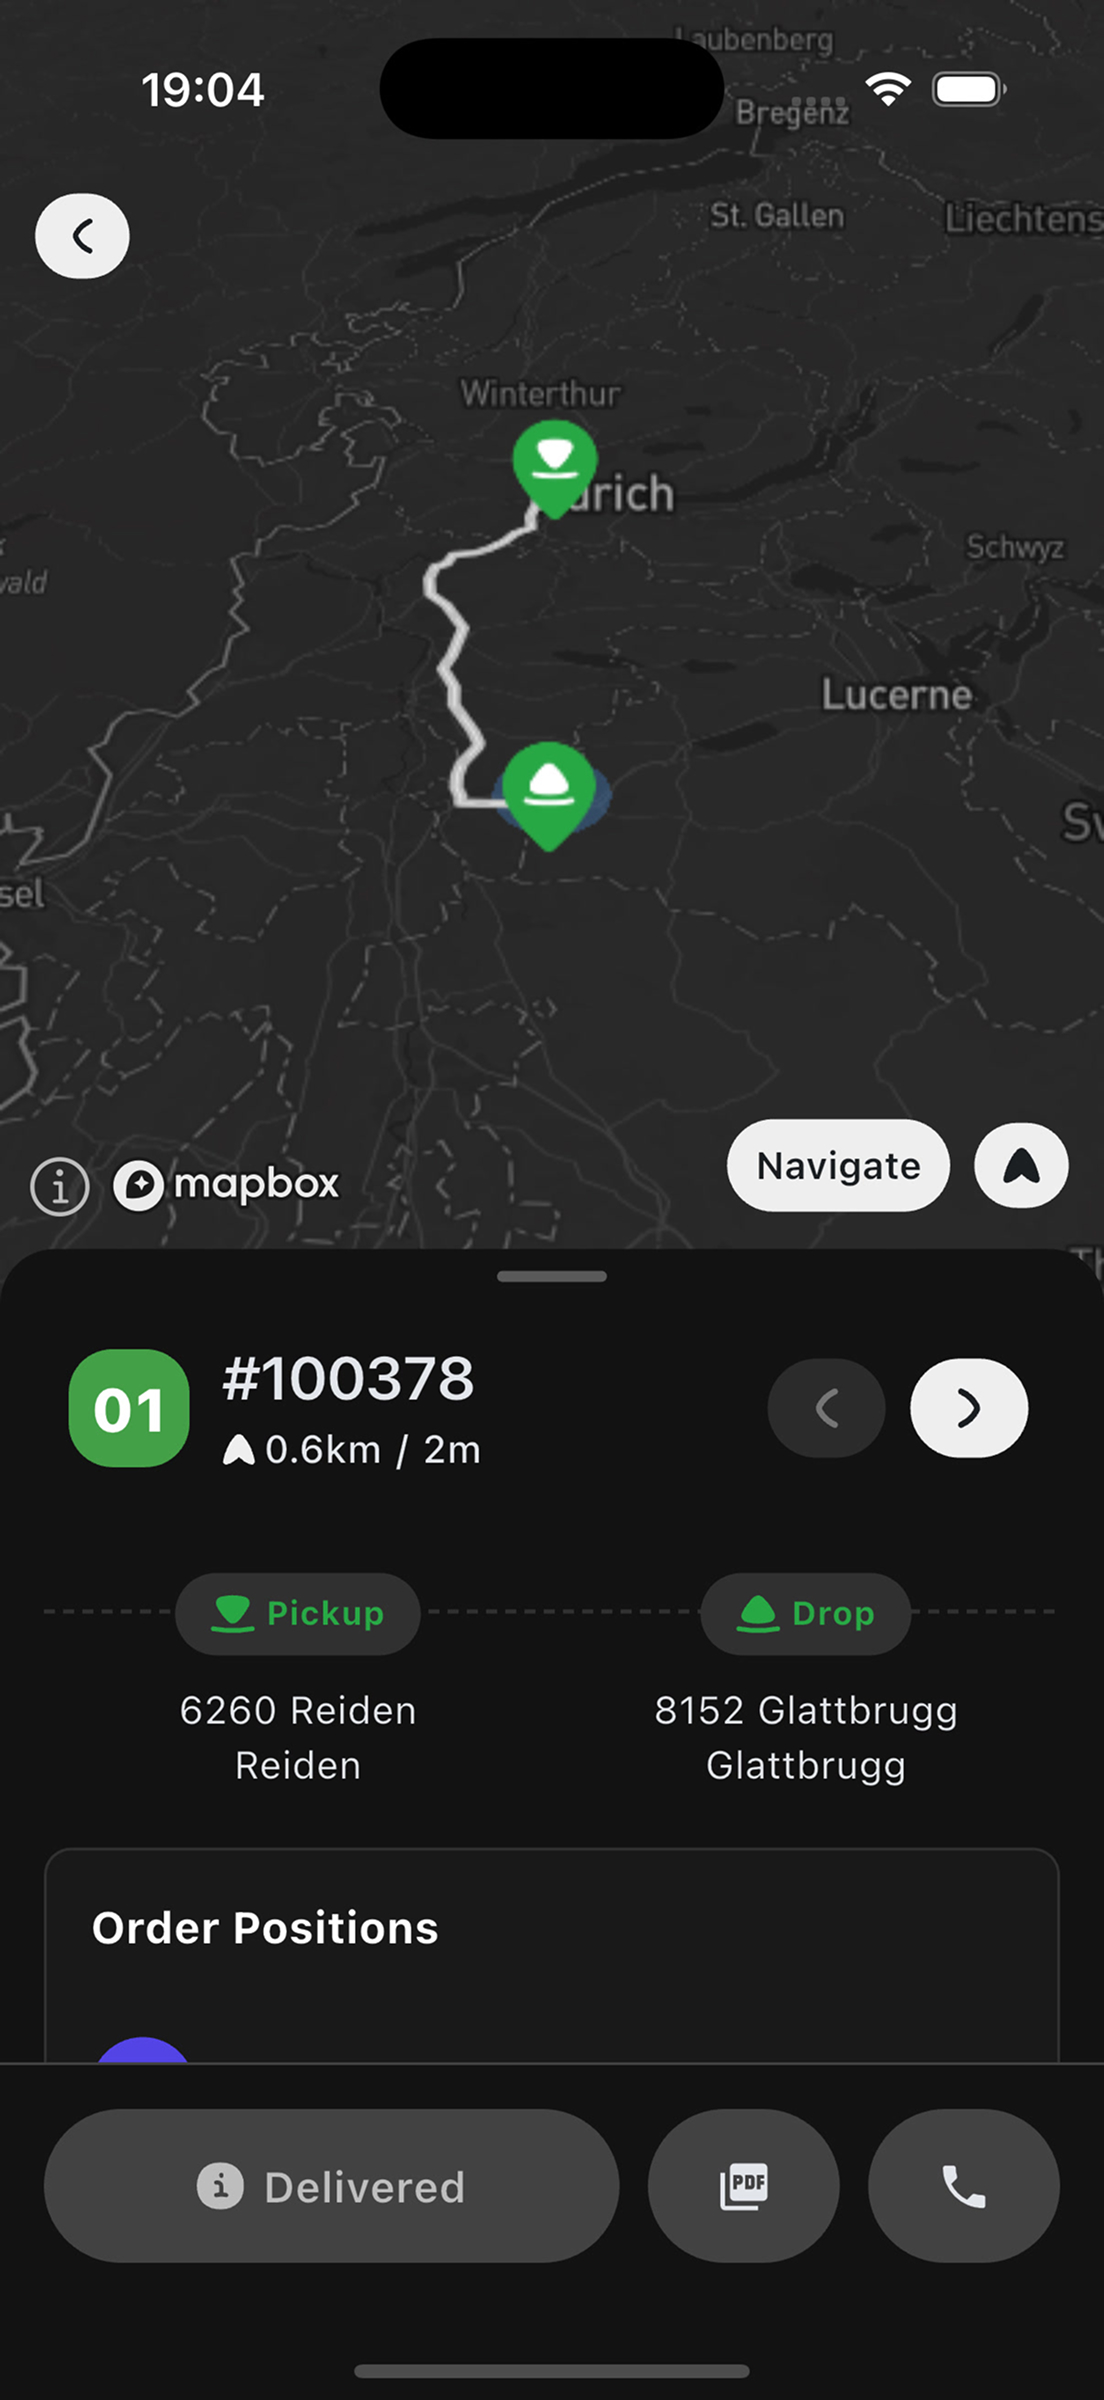
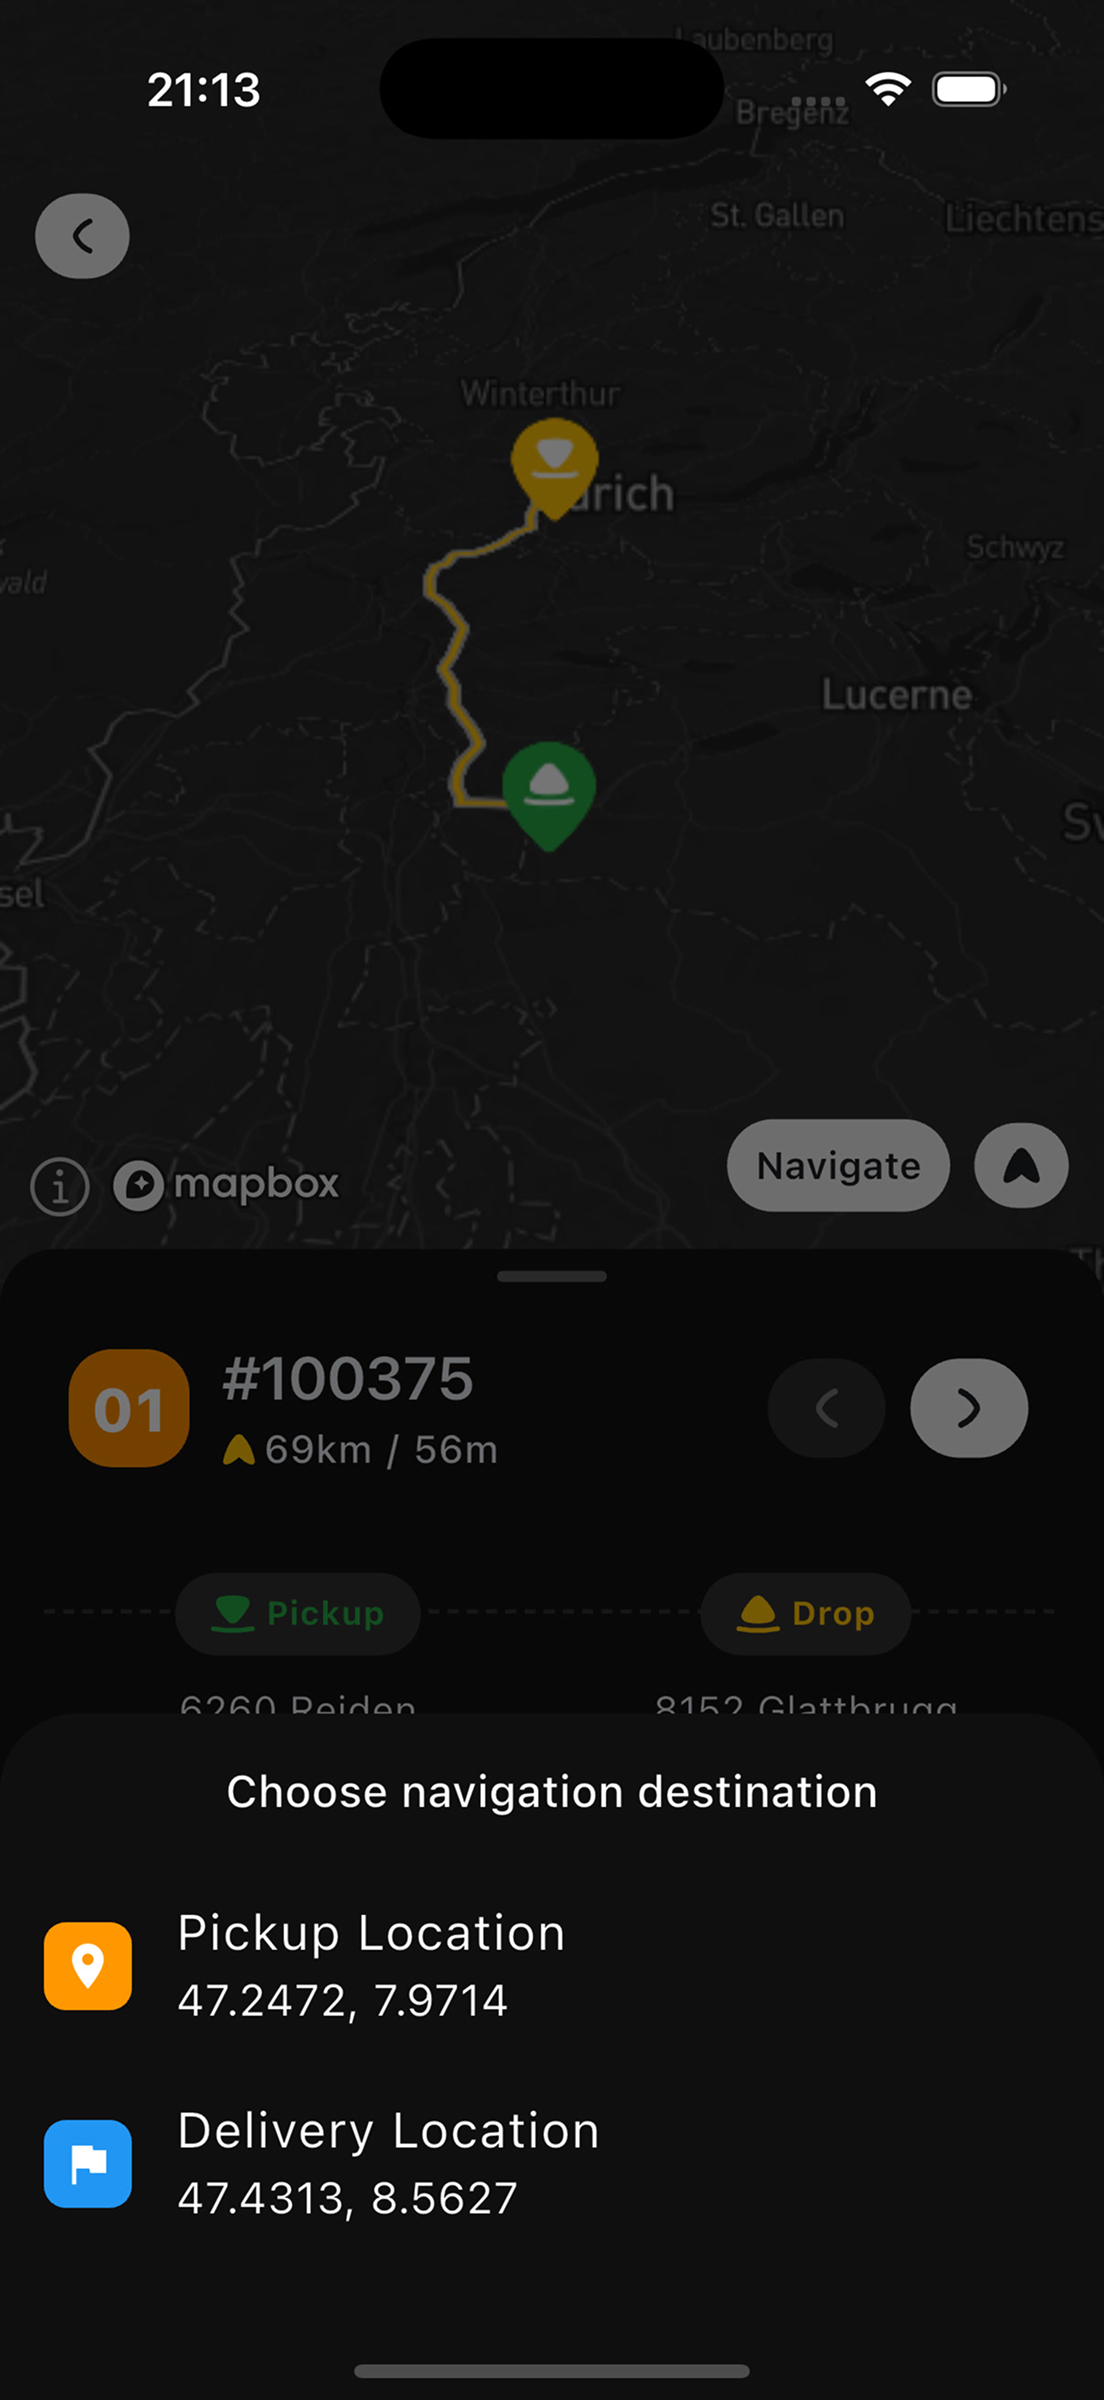
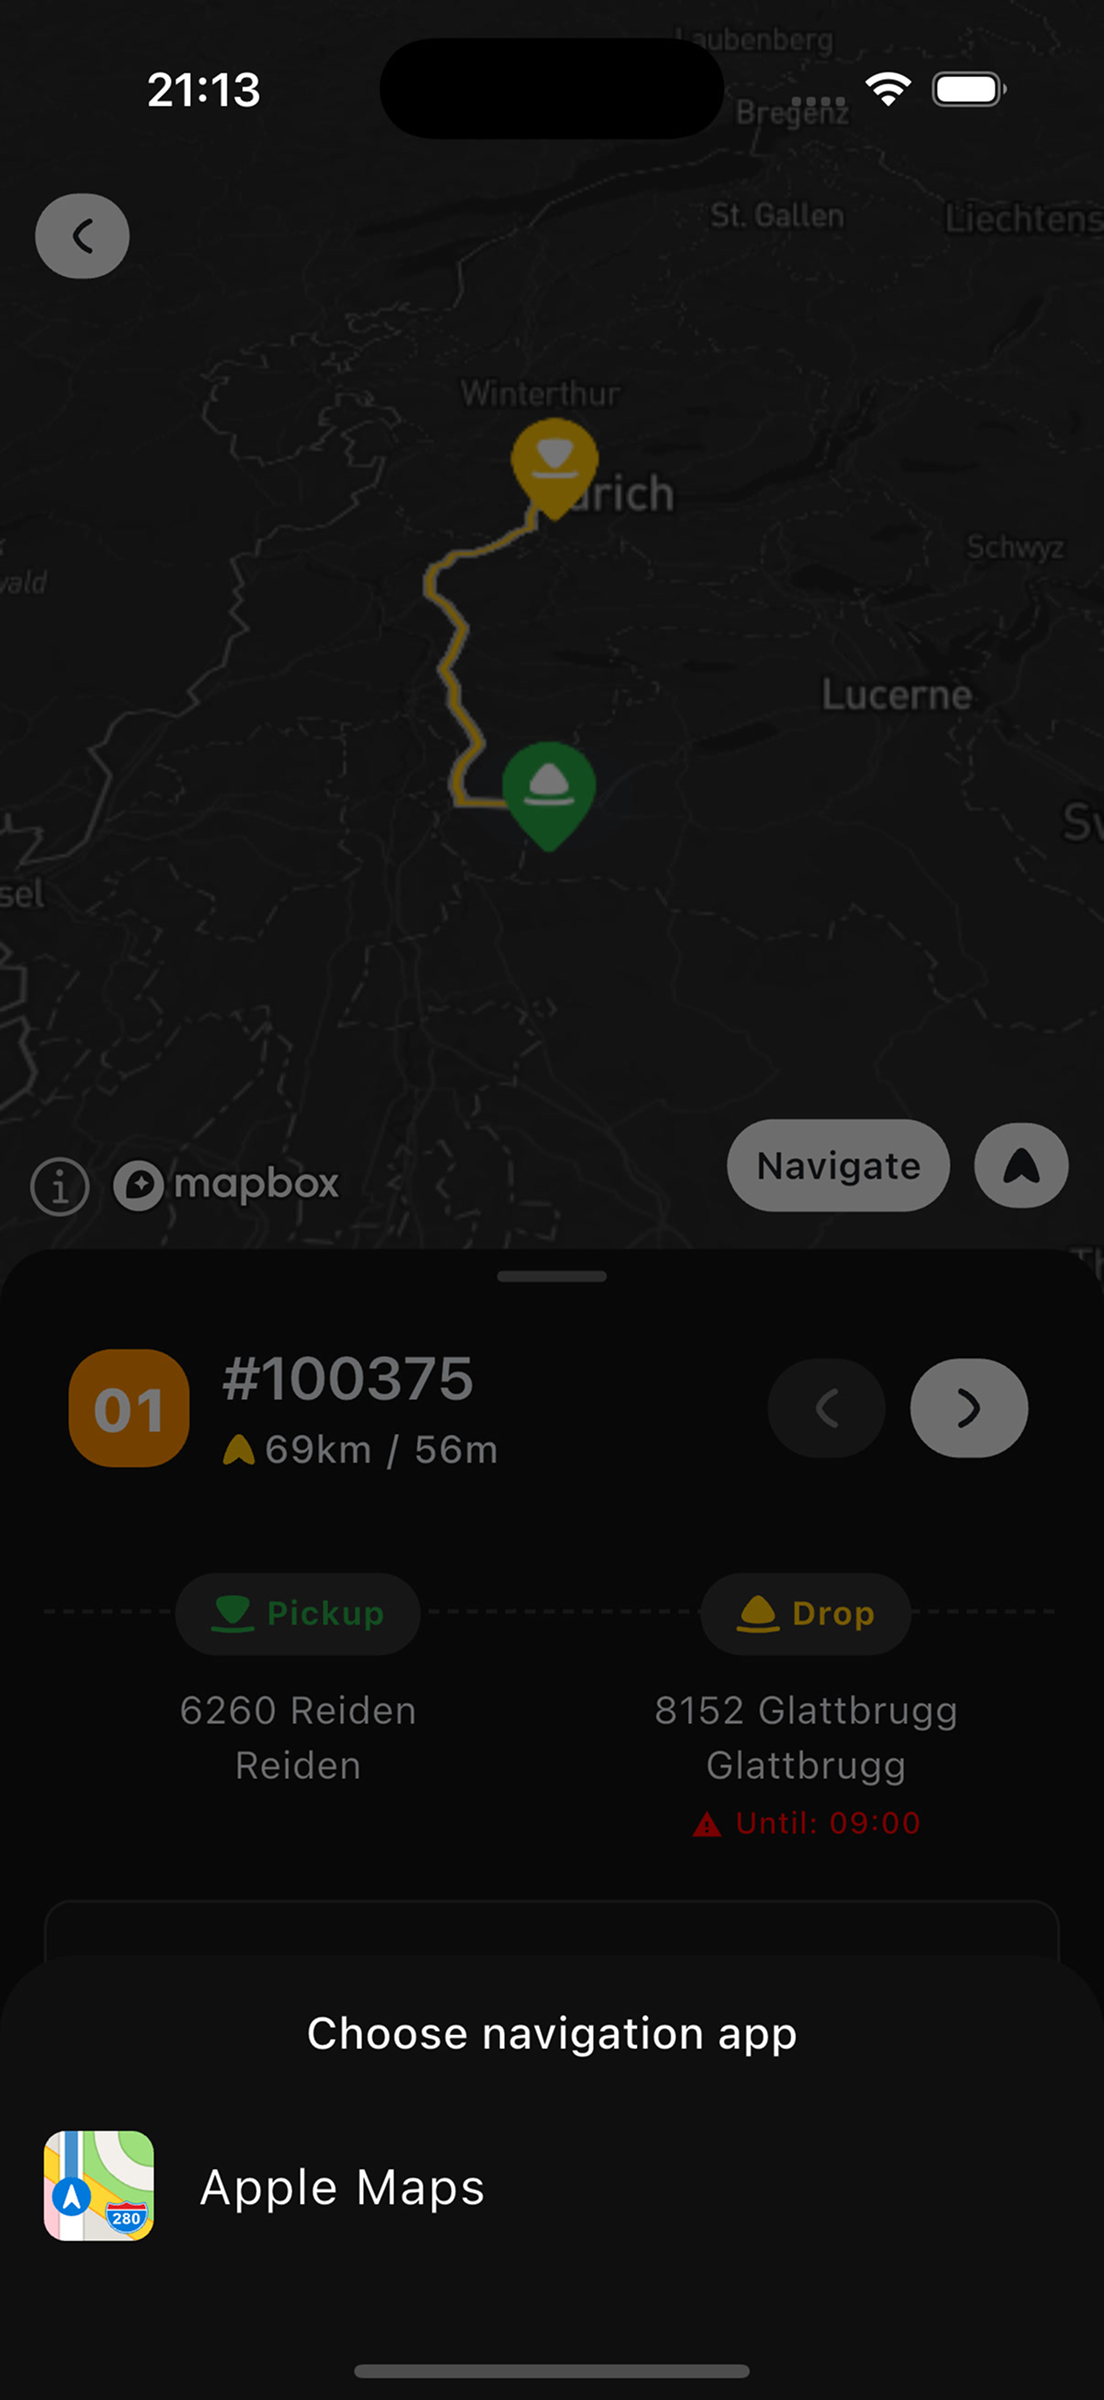
Navigating to Order Address
Navigation is available for each order:
- Open the order card
- Tap the
 "Navigate" button in the top right corner
 - If the order has multiple addresses (Pickup and Drop), choose the needed one:
- "Pickup Location"
- "Delivery Location"
- Choose the navigation app:
- Apple Maps (iOS)
- Google Maps
- Waze
- Other installed apps
- The route will open in the selected app

Calling the Customer
For quick customer contact:
- Open the order card
- Find the
 icon (if number is available)
 - Tap on the icon
- The dialer will open with the customer's number
Learn more about shift management.